Think of dryer air duct cleaning as more than just a chore—it’s a vital safety measure. This straightforward task involves clearing out all the flammable lint and debris that builds up in your dryer's ventilation system, which is crucial for preventing house fires and boosting your appliance's efficiency. A clean duct allows hot, damp air to flow freely outside, protecting your home and trimming down your energy costs.
Why Clogged Dryer Ducts Are a Serious Risk

That mountain of laundry isn’t your only concern. A clogged dryer duct is far more than a minor hassle; it's a genuine fire hazard and an energy hog that’s quietly emptying your wallet. While most of us are good about cleaning the lint trap, we often forget about the long, hidden ductwork where the real trouble brews.
This unseen buildup chokes off airflow, forcing your dryer to work overtime and run much hotter than it should. The result? Frustratingly long drying times and a ton of strain on the heating element and motor, which often leads to an early breakdown. You’re essentially paying for the same cycle twice—once on your hydro bill and again on expensive repairs.
The Financial and Safety Costs of Neglect
Putting off this task comes with real, tangible consequences. The longer your dryer has to run, the more electricity or gas it guzzles, and you'll see the proof on your monthly bills. If your clothes are still damp or feel unusually hot after a full cycle, that's a classic red flag that your dryer is fighting a blockage.
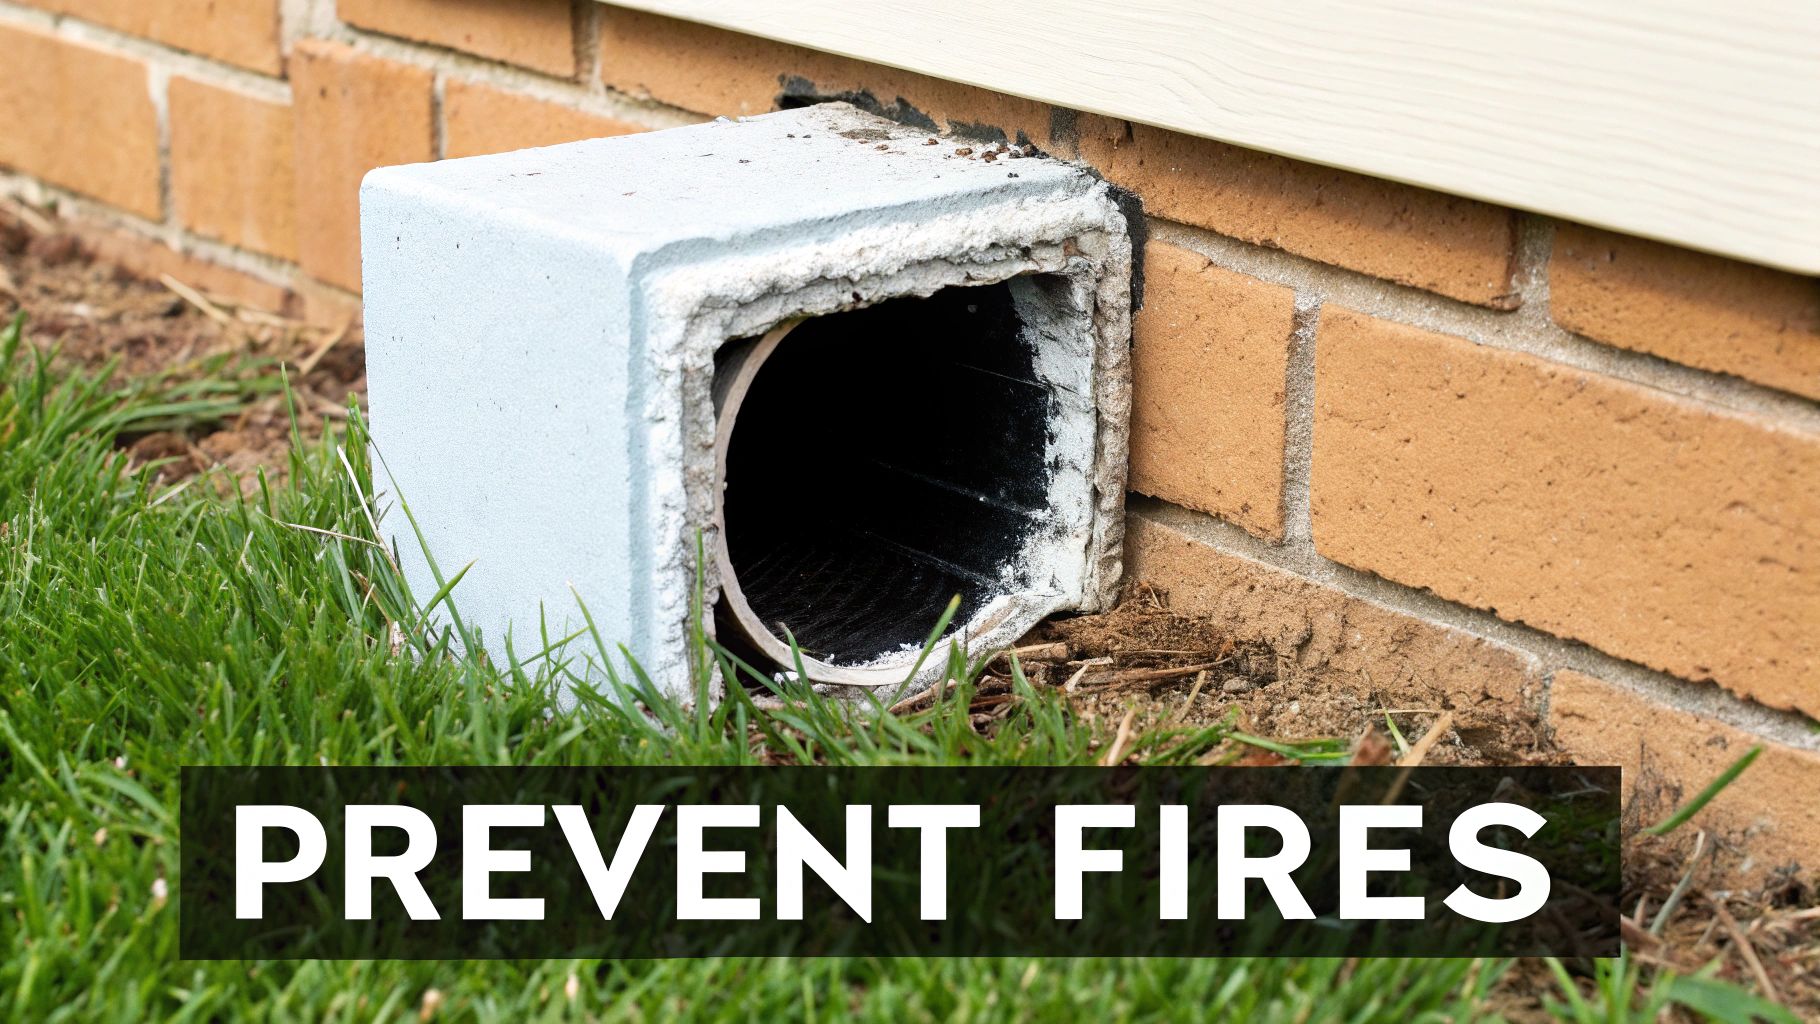
Even more frightening is the fact that lint is extremely flammable. When it piles up inside a hot, enclosed duct, you have the perfect recipe for a house fire. The statistics are sobering. Across North America, failure to clean dryer vents is a leading cause of residential fires, with data from the U.S. showing nearly 17,000 dryer fires annually. This highlights why regular maintenance is so critical for Canadian homeowners looking to reduce this preventable risk. You can find more details on these hazards over at DUCTZ.com.
Key Takeaway: Consistent dryer air duct cleaning goes beyond simple efficiency. It's one of the most critical preventative steps you can take to safeguard your home and family from a fire that never should have happened.
Beyond the Obvious Dangers
The headaches from a clogged duct don't stop at fire risks and high energy bills. Poor ventilation can spiral into other problems that impact your home's health and your own peace of mind.
- Moisture Damage: When damp air is trapped inside, it can seep into your laundry room walls and foster the perfect environment for mould and mildew growth.
- Carbon Monoxide Risk (Gas Dryers): For homes with gas dryers, a blocked vent is especially dangerous. It can prevent toxic fumes, including deadly carbon monoxide, from venting safely outside.
- Pest Infestations: The warm, sheltered opening of your exterior vent is an open invitation for birds and rodents to build nests, creating tough-to-remove blockages.
Once you understand these risks, dryer air duct cleaning shifts from a simple chore to an essential part of home safety. It's also crucial to know your options and avoid being taken for a ride, which is why we’ve created a guide on how to spot and avoid common https://candoductcleaning.com/blog/air-duct-cleaning-scams.
Getting Your Dryer Duct Cleaning Toolkit Ready

Before you even think about yanking your dryer away from the wall, let's talk about tools. Honestly, having the right gear is what separates a quick, satisfying job from a weekend of frustration. A proper dryer air duct cleaning hinges on being prepared, and that means more than just good intentions.
You probably have most of the basics already. A good screwdriver (or nut driver) for the duct clamp, some sturdy gloves to protect your hands, and a few old towels are a great start. And you absolutely need a vacuum with a hose attachment—it's your best friend for the final cleanup.
Do I Need a Special Cleaning Kit?
For the actual scrubbing, a dedicated dryer vent cleaning kit is a game-changer. You can find these at most hardware stores. They usually come with a set of flexible rods that you screw together, plus a brush that attaches to the end. The real trick is that most kits are designed to connect right to your power drill, turning that brush into a serious lint-busting machine.
But here’s a pro tip: pay close attention to the brush head. There are two main types, and grabbing the wrong one can spell disaster for your ductwork.
- Soft Nylon Brushes: If you have the common flexible, foil-style ducting, this is the one you need. The bristles are gentle enough to scrub away lint without tearing the delicate material.
- Stiffer Synthetic Brushes: For homes with rigid metal ductwork, a firmer brush is the way to go. It has the muscle to break up stubborn, caked-on lint that has built up over years.
Using a stiff brush on a foil duct is a recipe for a bad day. It can easily rip the material, which means you'll have moist, lint-filled air blowing into your wall cavities. That’s a much bigger problem than a simple clog.
Before you start, it's a good idea to lay out everything you'll need. This simple table breaks down the essentials, whether you're doing a quick touch-up or a deep clean.
Essential Toolkit for Dryer Duct Cleaning
| Tool/Material | Purpose | DIY Essential or Professional Grade |
|---|---|---|
| Drill-Powered Vent Cleaning Kit | The main tool for scrubbing the entire length of the duct. | DIY Essential |
| Powerful Vacuum Cleaner | Sucks up all the dislodged lint from the duct and surrounding area. | DIY Essential |
| Screwdriver or Nut Driver | To disconnect and reconnect the vent clamp from the dryer. | DIY Essential |
| Work Gloves | Protect your hands from sharp metal edges and grime. | DIY Essential |
| Aluminum Foil Tape | For resealing the duct connection. (Do not use standard duct tape) | DIY Essential |
| Old Towels or Drop Cloth | To catch any mess and protect your floors. | DIY Essential |
Gathering these items beforehand will make the entire process smoother and more efficient.
First Things First: Safety Prep
No dryer air duct cleaning job should start without thinking about safety. It’s simple, but critical. Before moving the appliance even an inch, you have to disconnect the power. For an electric dryer, that just means unplugging it from the wall. Easy.
If you have a gas dryer, there’s one more crucial step: shut off the gas supply line. You'll usually find a small valve on the gas line behind the dryer. Give it a quarter turn so the handle is perpendicular to the pipe.
Crucial Safety Note: If you feel even a little bit unsure about shutting off a gas line, stop right there and call a professional. This isn't the time for guesswork.
Taking these few moments to prep for safety ensures your project goes off without a hitch.
How to Perform a Thorough Dryer Duct Cleaning
Alright, you’ve got your tools and you’re prepped for safety. Now for the main event: cleaning out that dryer duct. This isn't a complex job, but doing it methodically is what separates a quick fix from a job well done. We're going to work our way from the back of your dryer right out to the exterior vent.
First things first, gently ease your dryer away from the wall. You'll want enough room to work behind it without feeling cramped. Once you have access, grab your screwdriver or nut driver and loosen the clamp that secures the flexible duct to both the dryer and the pipe in the wall.
Carefully wiggle the duct free from both ends. Don't be surprised if a puff of lint—or a small mountain of it—falls out. This is exactly what those old towels are for. Take a second to clean out any lint you can see right inside the dryer's exhaust opening before moving on.
Tackling the Ductwork from Inside
Now, it's time for that drill-powered cleaning kit. Attach the brush head to one of the flexible rods. Before you even think about the drill, manually push the brush a little way into the ductwork in the wall to get it started.
Next, connect your drill to the rod. Make sure it's set to spin clockwise. This is critical. Never run the drill in reverse, because the rods could unscrew from each other and get stuck deep inside the duct. Trust me, that's a headache you don't want.
Slowly guide the spinning brush deeper into the duct, adding more rod sections as you need them. You’ll feel it biting into the built-up lint and navigating the bends in the pipe. Go slow and steady, moving the brush back and forth in a scrubbing motion to really clean the inside walls.
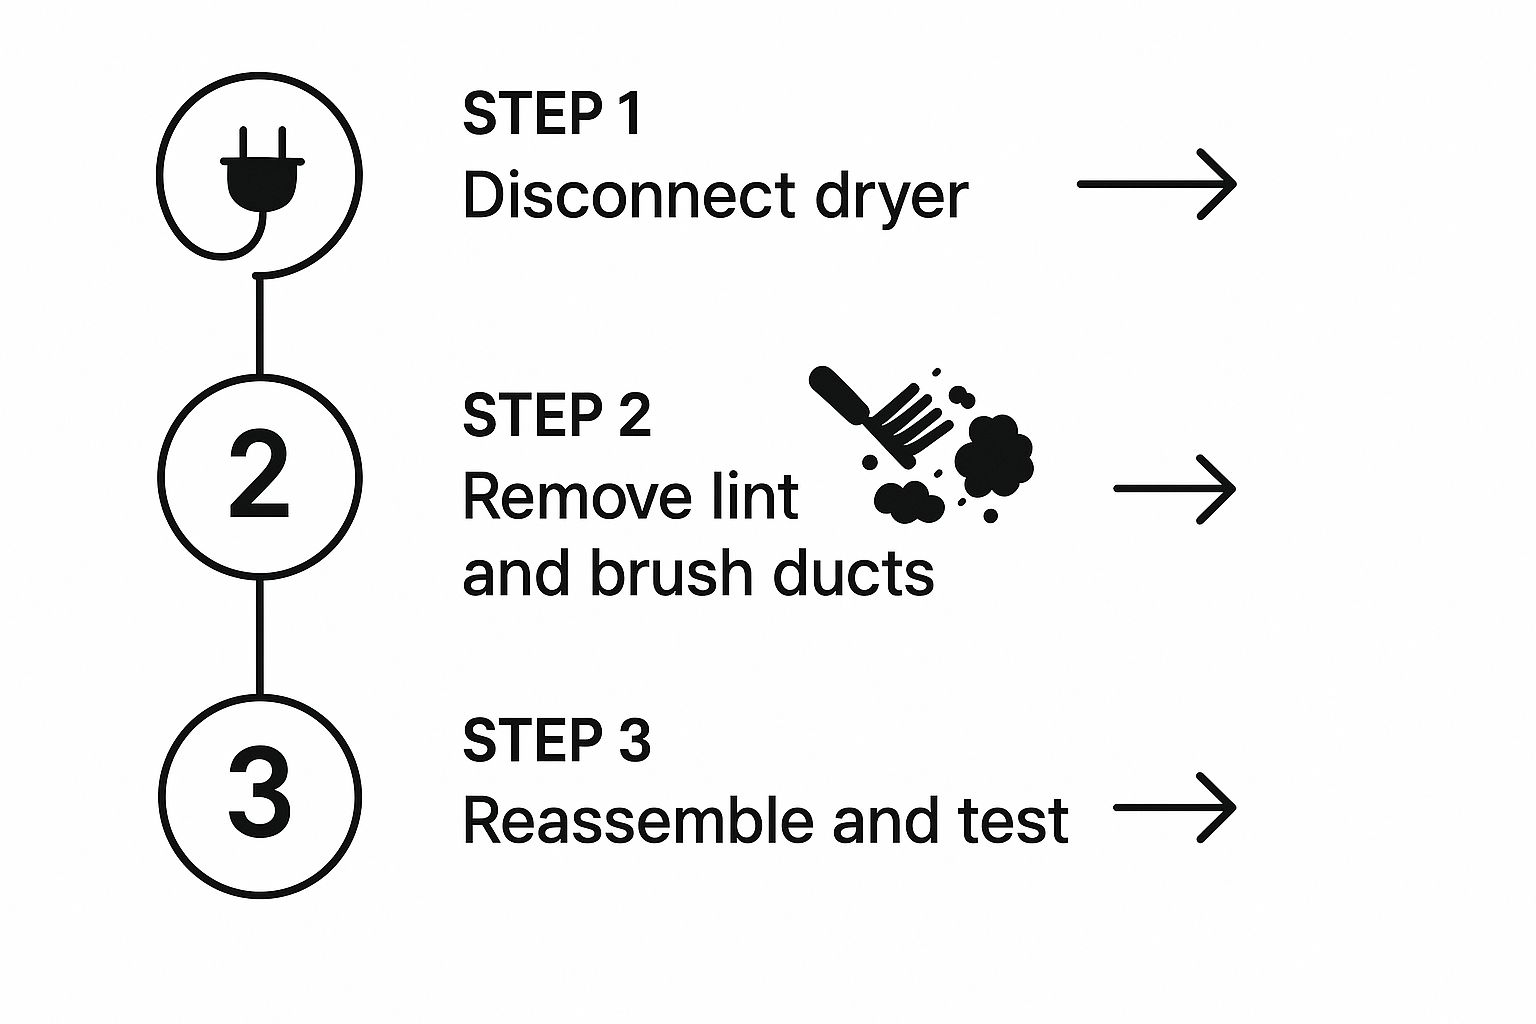
This image breaks down the essential steps for a successful cleaning.

Seeing the process laid out like this really drives home the point of being systematic. It ensures you cover all your bases, from taking things apart to the final check.
Cleaning the Exterior Vent Cap
Once you've pushed the brush as far as it can go from inside, it's time for a trip outdoors to the exterior vent. You should see a good amount of lint getting pushed out by your hard work.
Carefully remove the vent cover. Some are held on by screws, others just pop off. Clear out all the gunk from the cover itself and the flaps, making sure they can move freely. This spot is a prime location for birds or critters to build nests, so give it a good inspection.
With the cover off, you can now attack the duct from the outside in, meeting in the middle. This pincer movement ensures the entire length of the duct is spotless. When you're finished, use your vacuum to tidy up all the lint you've dislodged from around the vent area.
While cleaning your dryer duct is a specific job, the basic idea of removing contaminants to improve airflow is universal for your home's entire ventilation system. You can get the bigger picture in our guide to air duct cleaning.
The Final Steps: Reassembly and Testing
Head back inside—we're in the home stretch. The first job is to clean the flexible transition duct itself. If you've got one of those flimsy, foil-style ducts and it's looking a bit crushed or torn, now is the absolute best time to replace it with a sturdier, semi-rigid metal version.
Pro Tip: Don't forget the lint trap housing. After you pull out the screen, use a skinny vacuum attachment or a long, narrow brush to get deep into that cavity. It’s amazing how much lint manages to sneak past the screen and get packed in there.
Reconnect the duct securely to the dryer and the wall pipe, making sure the clamps are good and tight. A little bit of aluminum foil tape (not the grey stuff!) can create an even better seal. Gently slide the dryer back into its spot, being careful not to kink or crush the duct you just cleaned.
Last step: plug the dryer back in and turn the gas supply back on if applicable. Run the dryer on a no-heat or timed-dry setting for 15-20 minutes. Pop back outside and check the exterior vent—you should feel a strong, consistent flow of air. That's the feeling of a job well done.
Knowing When to Call a Professional
Tackling your dryer ducts yourself is a great way to handle routine maintenance, but let's be honest—some situations are best left to the experts. Knowing when to put down the DIY kit and pick up the phone is the key to preventing a small headache from turning into a major, costly repair.
Sometimes, your dryer will tell you everything you need to know. If you've already given the ducts a thorough clean and your clothes still take two cycles to dry, that's a red flag. Another big one? The top of the dryer is scorching hot to the touch while it’s running. These are classic signs of a deep, stubborn blockage that your brush kit simply can't handle.
Complex Duct Systems and Stubborn Blockages
Not all dryer vents are simple, straight shots to the outdoors. The easy-to-clean setup in one house can be completely different from the complicated system in another. It’s time to seriously consider calling in a pro if your home has any of these features:
- Exceptionally Long Duct Runs: In larger homes, townhouses, or apartments, ductwork can sometimes snake through walls and ceilings for 25 feet or more. A standard DIY kit just doesn't have the reach for that.
- Multiple Sharp Turns: Every single 90-degree elbow is a prime spot for lint to build up and create a bottleneck. Professionals have powerful vacuums and flexible tools specifically designed to navigate these tricky corners.
- Suspected Pest Blockages: If you think a bird or rodent has decided your exterior vent is the perfect spot for a new home, you're dealing with more than just lint. These nests are dense, compacted, and require special tools to remove completely without damaging your ducts.
A professional service isn't just about cleaning; it’s about diagnostics. A trained technician can use specialized cameras to inspect the entire length of the duct, identifying hidden damage, crushed sections, or improper installation that could be compromising safety and efficiency.
Weighing the Cost and Benefit
It might seem like an extra expense, but hiring a professional is really an investment in your home's safety and your own peace of mind. Here in Canada, where we take home safety seriously, professional servicing is a common part of home maintenance.
A pro doesn't just show up with a brush. They bring commercial-grade equipment to dislodge and capture all the debris, making sure that lint and dust aren't just blown back into your living space. They'll also inspect your connections, check for proper airflow, and spot any potential hazards. This is especially valuable if you're bundling it with a full HVAC system cleanout. If you're wondering about the time commitment, you can learn more about how long air duct cleaning takes in our detailed guide.
Keeping Your Dryer Duct Clear All Year Round

Alright, you've just put in the work and given your dryer's air duct a thorough cleaning. Great job. The last thing you want is for all that hazardous lint to come right back.
The secret isn’t to repeat that deep clean every month. It’s about creating a simple, repeatable maintenance routine that keeps your dryer running safely and efficiently. Think of it less as a huge annual project and more as a series of small, consistent checks.
These little habits are surprisingly easy to adopt, and they make a world of difference in preventing fire risks and keeping your energy bills down. When it comes to dryer safety, being proactive always wins.
Setting Up a Simple Maintenance Schedule
Putting a basic schedule in place removes the guesswork. When you break down the tasks by week, month, and year, you make sure nothing important gets forgotten.
Honestly, the most powerful habit you can build is cleaning the lint screen after every single load. No exceptions. It's the number one thing you can do to stop lint from ever reaching the ductwork to begin with.
From there, here’s a practical routine that works for most households:
- A Quick Weekly Peek: Wander outside and check the exterior vent cap. All you're doing is making sure leaves, snow, or a stray bird's nest haven't blocked the flaps.
- A Monthly Check-In: Pull the dryer out just enough to glance at the duct connection. You just want to see that it’s still secure and hasn’t been squashed or kinked.
- The Annual Deep Clean: This is when you'll repeat the full dryer air duct cleaning process we walked through earlier, or you can call in a pro to handle it.
Here’s a pro tip from someone who has seen it all: if you have a flimsy, accordion-style foil duct, consider upgrading. Swapping it for a semi-rigid or rigid metal one is one of the best long-term improvements you can make. They allow for much better airflow, are far less likely to trap lint, and make cleaning a breeze.
Weighing the Costs and Benefits Over Time
Staying on top of maintenance isn't just about safety; it's also smart financially. A DIY clean costs next to nothing, while bringing in a professional offers total peace of mind, especially for more complex duct runs.
The cost of professional services can vary depending on where you live and the size of your home. For some context, the average air duct cleaning service in California costs around $388, but that can change based on specifics. Dryer vent cleaning is a crucial piece of that puzzle, directly impacting your home’s safety and your dryer’s efficiency. You can get a more detailed look at how air duct cleaning costs are determined from Angi.com.
Ultimately, a simple routine protects your investment by extending your dryer's lifespan and ensuring it performs at its best. If you're still not sure what schedule is right for your family, our guide on how often to clean air ducts can help you figure it out.
Common Dryer Duct Cleaning Questions
Even with a detailed guide, a few questions always pop up. It's completely normal. Let's run through some of the most common things homeowners ask us so you can tackle this job with total confidence.
Getting these details right is the key to doing the job safely and getting it done right the first time.
How Often Should I Clean My Dryer Duct?
The standard answer is once a year, and for most folks, that's a pretty good rule of thumb. But let’s be real—not every household is "average."
You should really aim for a cleaning every 6 to 9 months if you're dealing with a higher-than-usual amount of lint.
This usually applies to homes with:
- Large families running the dryer almost daily
- Pets that leave fur on everything (we see you, golden retriever owners!)
- An extra-long duct that winds its way to the outside wall
Honestly, your dryer will tell you when it’s time. If clothes are still damp after a full cycle or the top of the machine feels unusually hot, that's your cue.
Can I Use a Leaf Blower to Clean My Dryer Duct?
Ah, the old leaf blower trick. It sounds like a genius hack, but from my experience, it almost always does more harm than good. Blasting high-pressure air into the line can turn a loose lint problem into a dense, compacted plug deep inside the duct.
Take It From A Pro: This shortcut can easily tear flexible ducting and blow a nasty cloud of dust and allergens right back into your laundry room. A proper brush kit is a much smarter choice because it actually scrubs the lint off the walls and pulls it out, instead of just pushing it around.
What Is the Difference Between Dryer Duct and Air Duct Cleaning?
This is a big one, and it's easy to get them mixed up. They sound similar, but they're two completely different services for two very different parts of your home.
Dryer duct cleaning is laser-focused. It's all about clearing that one single vent line from your clothes dryer to the outside. The mission here is simple: remove flammable lint to prevent fires and help your appliance run efficiently.
Air duct cleaning, on the other hand, is a whole-home service. It involves cleaning the entire network of ductwork connected to your furnace and air conditioner—the system that delivers warm and cool air to every single room. The goal here is to improve your indoor air quality and keep your HVAC system in top shape. To see what that full process involves, check out our guide on residential duct cleaning services.
Ready to ensure your dryer is running safely and efficiently? Trust the certified experts at Can Do Duct Cleaning for a professional and thorough service. Schedule your free on-site inspection today!


